![]()
Please 'Boom' Responsibly As most of you have noticed, the noise ordinances have become much tougher lately. Most of this is due to idiots, yes IDIOTS, who drive through residential areas with their windows down while their system is playing at full power. To make things worse, the music they listen to has all sorts of foul language that's not suitable for small children, (who may be playing outside). There are even a few people, who are even beyond idiot status, that play their systems at full power through residential areas after 10:00 PM (when many people go to bed). I don't believe that this type of behavior is good for the industry. If the fines get too stiff, people will stop buying large systems. If this happens, more people will get out of car audio (who wants a mediocre system). People get interested in things because they're exciting. A deck and four 6.5" speakers are not going to interest many of the younger car audio enthusiasts. If car audio enthusiasts keep annoying more and more people, the fines will keep getting tougher. All of this will only reduce interest in the equipment that fuels the industry. If you want to listen to your system at full volume, get out on the highway where there's little chance of bothering anyone. When you get to a red light, turn it down. If the only thing attractive about you is your 'system', you have some work to do. Bottom line... Think about what you're doing. Think about other people. It's not the end of the world if you have to turn the volume down for a little while. |
| Car Audio Subwoofer
Primer This page will touch on a few new topics (all of which are covered in detail on upcoming pages). It will attempt to help you get what you want from your audio system and your subwoofer in particular. Make up your mind: Many people don't realize that, unless you have virtually unlimited resources, there are going to be trade offs when designing a system. If you want a system to produce a lot of SPL (but have limited power or number of speakers), you'll probably have to concentrate a lot of the acoustic energy within a small band of frequencies. This would allow you to generate the desired SPL and properly impress your friends. It would, however, leave you with a system that would have less than perfect frequency response and marginal performance at the low frequency end of the spectrum. You could design a system that would produce the desired SPL at all frequencies but it would require significantly more power and speakers than the aforementioned system with the narrow peak. Manufacturers Recommendations: Many manufacturers recommend an enclosure that's going to give you a peak like we mentioned earlier. This will give you good results for rap or other bass heavy music. If you listen to those types of music, this system may perform satisfactorily. If you listen to all types of music, you'd likely want an enclosure that would give a flatter response. To get a flatter response, you could increase the size of the enclosure but the overall response wouldn't be perfectly flat. To build a system that had a perfectly flat frequency response (generally desired by audiophiles), you'll have to take the vehicle's transfer function into account (this will be discussed later). When a manufacturer recommends a particular enclosure, you should ask yourself (or, better yet, the manufacturer) what the enclosure is optimized for. Enclosure Types: When laying out a system, you need to decide what type of enclosure to use. No enclosure is magic. A sealed enclosure will be the smallest (for a given response shape) and will have good low frequency extension but may not have the best low frequency extension. If space is limited, this may be your best choice. A ported enclosure will generally have a better low frequency extension for a given response shape (alignment) but would require a larger enclosure. If you made the enclosure as small as the sealed enclosure but ported it to gain the low frequency response, the output would deviate from the desired flat response. A bandpass enclosure can sound good and give you a flat response but most of the generic bandpass enclosures are not designed for a flat response. They are designed to impress you in the stores. This means that they are built to produce a large peak at some frequency near 60hz. These enclosures will work well with something like rap music but generally won't sound good with other types of music. If you use a bandpass enclosure, it should be designed specifically for your speakers. If you're building your first system, I'd recommend a sealed enclosure. It is the simplest enclosure and will be the easiest to get right. A sealed enclosure only needs to be the right size and well sealed. Alright... Enough of my opinions. Move on to the next section. Calculating Speaker Enclosure Volume
|
| In the calculators that follow, if you are using internal measurements, make sure the wood thickness is set to '0' (zero). |
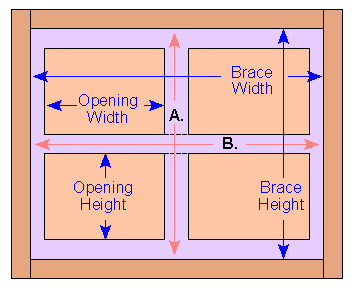
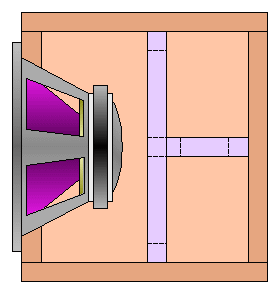
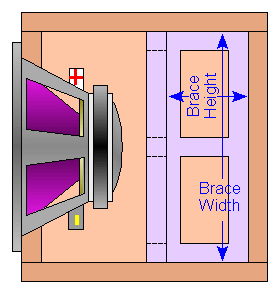
| Please don't email me with requests to
build an enclosure. I simply don't have the time to do
it. If you want to buy a well built enclosure, go to the
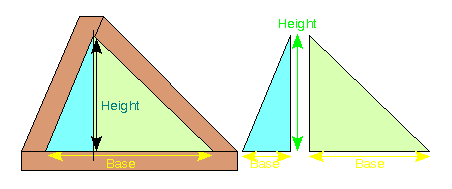
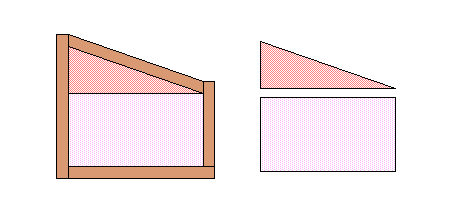
following site: Woodlawn Cabinetry Triangles without right angles: The
easiest way to determine the volume of boxes similar to
those below is to split the cross section so that you end
up with 2 right triangles. Then you simply do as in the
previous example. Combination boxes: Some boxes are a
combination of rectangles and triangles like the box
below. You can see that you simply split up the box into
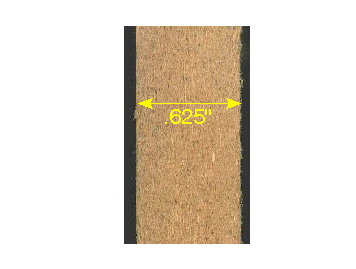
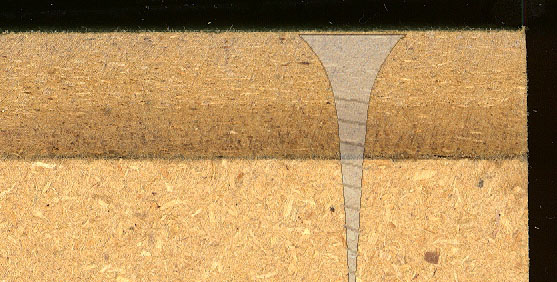
manageable shapes and do_the_math. MDF Medium Density Fiberboard is a
compressed type of 'wood product' It is similar to
particle board but is much 'friendlier' to work with than
is particle board. The wood cuts with less dust and
leaves a good clean cut as is seen below. It also resists
chipping when screwing close to the edge. You
should still pre drill the screw holes when assembling a
box with drywall screws because the wood will split
if a screw is driven into the end of the board. Many
people (myself included) use a pneumatic stapler and a
good quality wood glue to assemble boxes. Some people use
liquid nails type adhesives to seal the joints but the
solvents in construction adhesives can soften the
adhesives used on some speakers (which could lead to
premature speaker failure if the speakers are installed
before the adhesive has dried completely). You should
also realize that the fumes are flammable (and may be
explosive when contained). If you have a loose speaker
connection on the speaker terminals, you may have a
fire/explosion hazard if the speakers are played before
the solvent has fully evaporated. Silicone adhesive has
acetic acid which is released as the adhesive cures. This
acid will corrode speaker baskets if the speakers are
reinstalled before the silicone has completely cured. The
best way to make sure the enclosure is sealed is to make
good quality cuts. It will take less time to make good
cuts than it will for the sealant to dry/cure (24 hours).
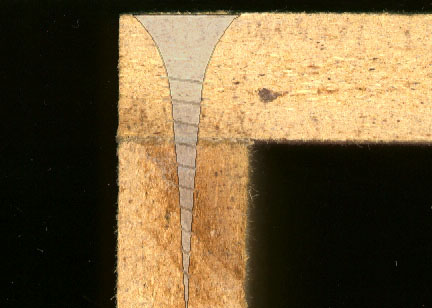
This is the end of the board where the
screw holes were predrilled. You can see that the wood
didn't split. This is the what the screw looks when
you don't countersink the screw holes. This is what can happen when you don't
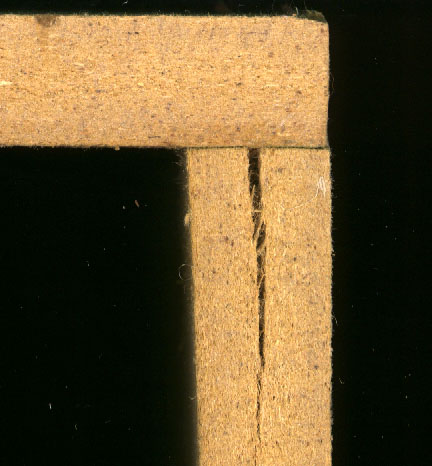
predrill the holes. This is what the edge of the box should
look like. There should be no gap between the two pieces
of wood. The strength of the enclosure depends largely on
the accuracy of the cuts. Wood glue is not designed to
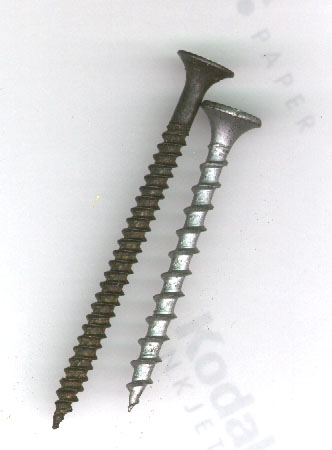
fill large gaps. The picture below shows two different
types of drywall screws. The coarse threaded screw is,
IMO, a better screw for box building. They go in more
quickly and don't strip out as easily but may be more
likely to cause the wood to split. Try both types and use
the one that works the best for you. I used the coarse
threaded screws in the previous pictures. The galvanized
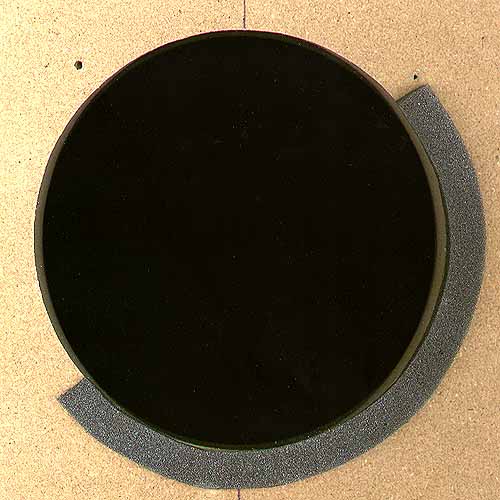
screw below is a #6 drywall, and is 1 5/8 inches long. Sealing around speaker: If the speaker has no gasket and the speaker box isn't covered in carpet or vinyl, You can use an open cell foam weather stripping around the cutout in the baffle. The weather stripping should be about 3/8 to 1/2 inch wide and 1/2 inch thick. The weather stripping in this example is 3/8 inch thick and 1/2 inch wide. You need to make sure that the area around the cutout is clean and dry so that the weather stripping will stick. I recommend wiping it down with solvent and allowing it to dry before applying the weather stripping. If you REALLY want it to stick, apply a single coat of contact cement to the area around the hole and allow it to dry for 10 minutes or until it no longer sticks to your fingers when you touch it. When applying the weather stripping to the coated area, you get only ONE chance to lay it down in the right place. As soon as the weather stripping touches the contact cement, it's not coming back up. This is the weather stripping applied
around the cutout. I didn't go all of the way around for
this example but you DO have to go all of the way around.
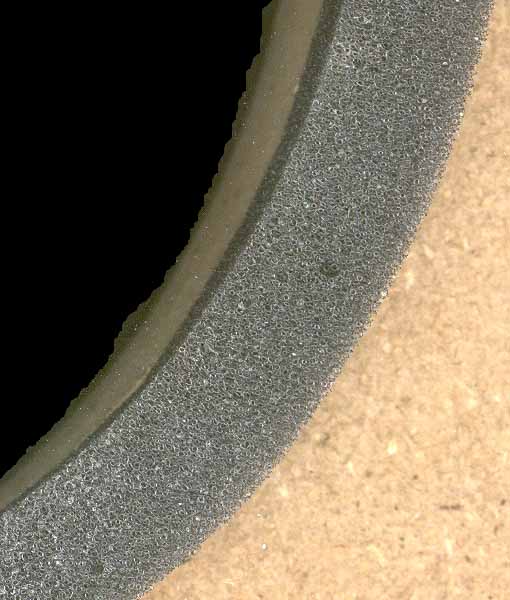
This is a closer view of the same
thing. This shows the adhesive backing. Some
weather stripping has a really thick backing that won't
allow you to bend it around the cutout. You need to get
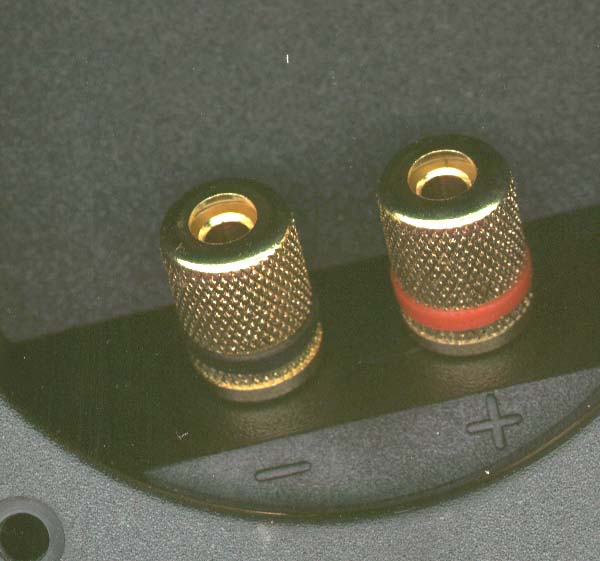
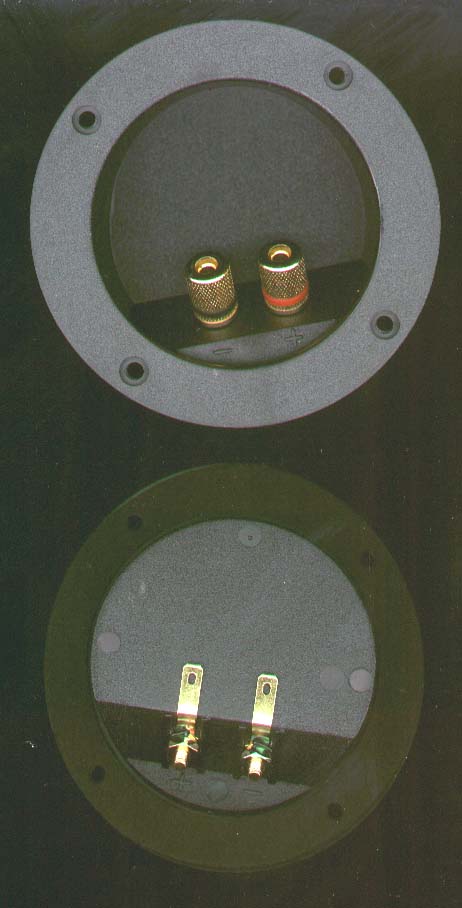
something that is similar to what is shown here. Terminal Cups: If you want some nice terminal cups for your enclosure, the following are available from Madisound. They will accept large gauge wire or banana plugs. Close-up:
Front and Back:
Circle Cutting Jig This is the base for the template cutter. The center pivot will be the anchor for the circle cutter jig. The blocks on the bottom of it are to be clamped in a Workmate or other vise. Top View This is the circle cutter jig. The
router mounts to this piece. The three holes are drilled
to match up with the holes on the router that you are
using. The holes that are lined up on this diagram are to
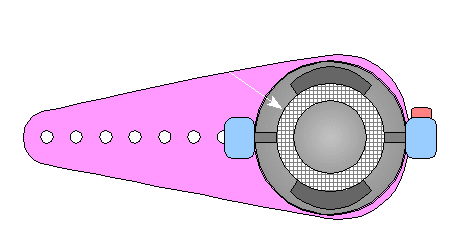
make templates with different diameter holes. This diagram shows the router mounted
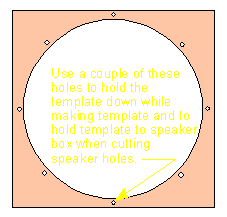
to the circle cutter. This is what a template will look like.
The holes match up to the mounting holes for the speaker.
The center hole is slightly larger than the final speaker
hole that you need. I will explain later. This shows how the router and circle
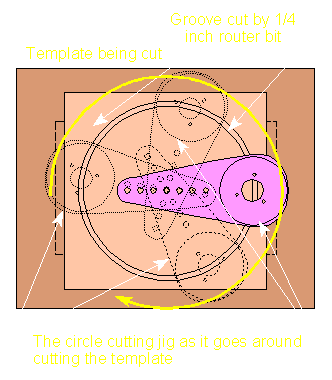
cutting template go around to cut out the template.
Router not shown. This is how the edge of this thing
looks. The template base mounts into the vice. The
sacrificial piece is on top of the template base. It will
allow the you to make numerous cuts without damaging the
base. The circle cutter goes on top of the sacrificial
piece. If you look at the yellow circle, you can see that
the router bit goes through the template being cut and
into the sacrificial piece of wood. Before you can put
the piece of 1/4 inch plywood or MDF that is to become
the speaker template onto the template base, you will
have to drill a 1/4 inch hole in it so that it will be
able to fit over the pivot dowel. After putting the
template_to_be over the dowel, you will have to bolt it
down with a few #6 X 1/2 flat head screws. If you make
the mounting holes in the same place as the holes in the
speaker, the same holes can be used to mount the template
to the speaker box. You will have to countersink the
screw heads so that the circle cutter can pass over them.
Crude representation of a flat head
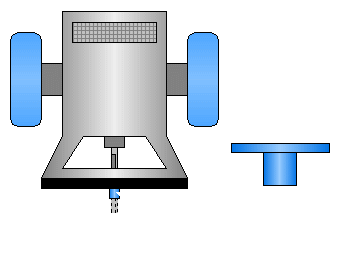
screw. This shows how the guide collar fits
onto the router. The collar is slightly larger than the
cutter. This is why the speaker template hole has to be
slightly larger than the actual speaker hole. The
router's collar will dictate the actual size differences
between the two holes. The collar is installed after the
router is removed from the circle cutter jig. If you have
more than one router, it will save a lot of time. You may
want to look in pawn shops as a cheap source of routers.
Before buying from the pawn shops, check the prices in
the regular outlets. Many pawn shops have really high
prices but some are really cheap so do your 'home work'. This is how the speaker template will
go on the box. You might want to center the template a
little better than I did though. :-) This is a side view of the template,
router and speaker box. You can see how the collar depth
is the same as the template material. The collar rides
around the inside of the template. The router bit goes
through the baffle of the speaker box and cuts the hole.
A plunge router will make getting the hole started a lot
easier but I was too lazy to draw a plunge router. Now, I know this looks like a lot of work but after you make the template base, the circle cutter and a few templates, you can cut perfectly round smooth speaker holes very quickly. I can cut out holes for a tweeter, woofer and port in approximately 20 seconds using this type of template and a large Makita plunge router. If you make all of the 8 screw holes in the template, you can mark and predrill them so that the speaker can be mounted perfectly straight the first time. Make sure to use router bits with carbide cutters. MDF will cause high speed steel cutters to die horrible painful deaths. When cutting the holes, keep forward pressure on the router until the cut is complete. If you stop in the middle of a cut, the vibration may cause the router bit to break. Note: If you only need to cut a couple of holes, you can use the circle cutter template without the template base. You would screw a long screw through the circle cutter jig, through the baffle board and into a sacrificial piece of wood. Of course, this would have to be done before the box is assembled. With this method, you don't have to use the guide collar and therefore don't have to compensate for the collar's diameter. You would cut the hole to precisely the desired final size. You must also clamp or screw the baffle board down so that is doesn't move as the cut is finished.
|
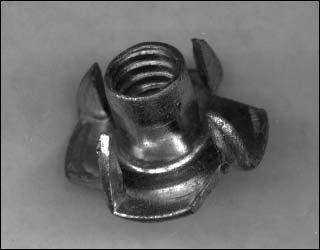
| Using T-Nuts: If you have very heavy
woofers or will need to remove your woofers frequently,
you'll need to use T-nuts. T-nuts are threaded metal
fasteners that are used to provide a solid mounting point
in wood. They are inserted into the back side of the
baffle board. A hole is drilled just large enough to
accept the cylindrical part of the T-nut. You insert the
T-nut into the hole and (if possible) give it a good
solid whack with a hammer. If you can not get to it to
hit it with a hammer, they can sometimes be pulled into
place by simply tightening the screw. This works fine on
softer woods but won't always work with MDF. Sometimes
the threads strip or the screws break before the T-nut is
fully seated. If you're having trouble getting them to
pull all of the way down, use a C-clamp to seat them. If
you don't get them to seat fully before mounting the
speaker, the screws will continue to loosen as the T-nuts
continue to pull down. Only after they are fully seated
will the screws stay tight. The photo below shows a T-nut
(larger than actual size).
This image shows their placement in the baffle board. The dashed lines show the diameter of the hole drilled to accommodate the T-nut.
|
| If you
find a problem with this page or feel that some part of
it needs clarification, E-mail me. This is a link to this site's home page. |
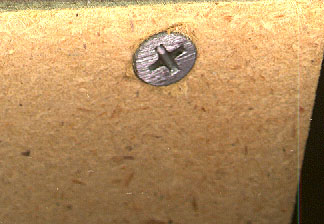
 Box building samples This picture
shows what the screw heads look like when they are
countersunk into the face of the board. The counter bore
recess was simply drilled to approximately 1/8 inch in
depth at the center of the hole. The drill bit was just
slightly larger than the head of the screw. This greatly
reduces the chance of chipping the edge of the wood. The
holes were also predrilled with a 3/32" drill bit to
prevent splitting the wood.
Box building samples This picture
shows what the screw heads look like when they are
countersunk into the face of the board. The counter bore
recess was simply drilled to approximately 1/8 inch in
depth at the center of the hole. The drill bit was just
slightly larger than the head of the screw. This greatly
reduces the chance of chipping the edge of the wood. The
holes were also predrilled with a 3/32" drill bit to
prevent splitting the wood. 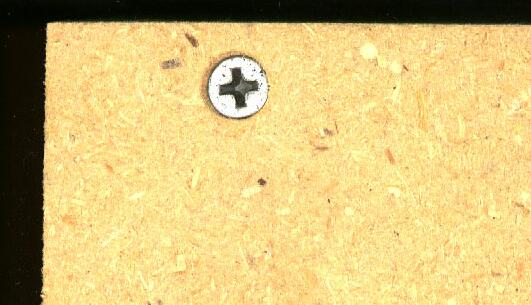
 .
. 
 Edge View