Please 'Boom' Responsibly As most of you have noticed, the noise ordinances have become much tougher lately. Most of this is due to idiots, yes IDIOTS, who drive through residential areas with their windows down while their system is playing at full power. To make things worse, the music they listen to has all sorts of foul language that's not suitable for small children, (who may be playing outside). There are even a few people, who are even beyond idiot status, that play their systems at full power through residential areas after 10:00 PM (when many people go to bed). I don't believe that this type of behavior is good for the industry. If the fines get too stiff, people will stop buying large systems. If this happens, more people will get out of car audio (who wants a mediocre system). People get interested in things because they're exciting. A deck and four 6.5" speakers are not going to interest many of the younger car audio enthusiasts. If car audio enthusiasts keep annoying more and more people, the fines will keep getting tougher. All of this will only reduce interest in the equipment that fuels the industry. If you want to listen to your system at full volume, get out on the highway where there's little chance of bothering anyone. When you get to a red light, turn it down. If the only thing attractive about you is your 'system', you have some work to do. Bottom line... Think about what you're doing. Think about other people. It's not the end of the world if you have to turn the volume down for a little while. |
|
Cutting the HPL to size: If you know the precise measurements of your speaker box, you may be able to get your HPL dealer to cut the pieces to size. Make sure to add approximately 1/2 inch to the required measurements when you get it cut. If you want to cut it yourself, the following description/tutorial may help (a little).
The following diagram shows a jig which will help you to cut HPL relatively easily. LEGEND
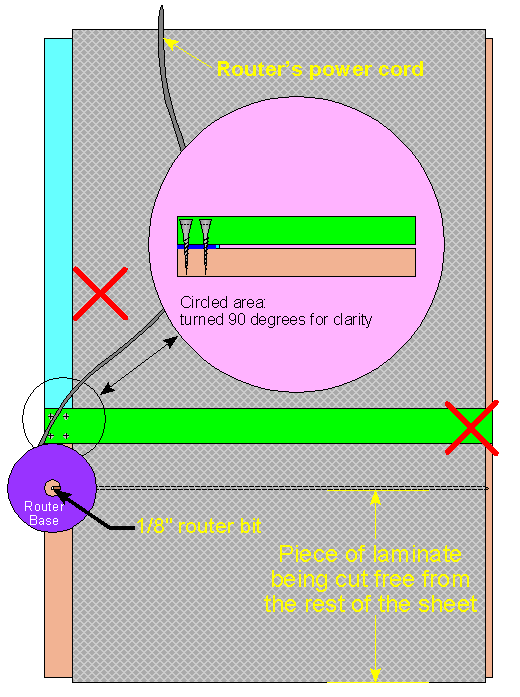
Getting started: To cut the HPL, I use a 1/8" carbide bit set to cut just slightly deeper than the thickness of the HPL. After clamping the free end of the fence down, make a cut without the HPL in place. This will allow the router to more quickly cut the HPL and will also allow you to easily see where the router will cut the HPL. With long cuts, you will see that the cord may get caught on the edge of the jig as you make the cut. To prevent this problem, drape the power cord over the long end of the jig (away from the fence).
Making the cut: If you already made the first cut in the base of the jig, you know exactly where the router will cut. Slide the MDF under the fence until it is in the proper position to cut the HPL to size. When it's in place, clamp it down in the places marked by the red X's. This will prevent the fence AND the HPL from moving during the cut. Then... Make the cut.
Note: If you're router's base isn't perfectly round, take note of how it rides against the fence during the primary cut into the base board. Make sure that you make your cuts in precisely the same way.
Bonding the HPL to the wood: Contact cement (CC) is the most common way to bond the HPL to the substrate (wood enclosure). I strongly recommend using a CC specifically designed for HPL. If you've never used CC, you should know that it's applied to BOTH pieces which are to be bonded together. After applying it to the components, you must wait until the CC is dry to the touch (10 to 15 minutes depending on temperature and humidity). After the CC is dry to the touch... when the two pieces (wood and HPL) touch, they are instantly bonded and it is very difficult to reposition the pieces. It's like letting the adhesive side of two pieces of adhesive tape touch together. When you set the HPL down, make sure that it is in the proper position.
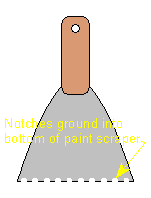
Applying the contact cement: There are probably a gazillion (I quit counting at 223,256 :-) different ways to apply the CC to the different components. My favorite method is to use a wide paint scraper/putty knife with some notches ground into its cutting edge. This allows a precise amount of CC to be applied to the surfaces. A trowel would also work for very large surfaces but for small enclosures, I'd strongly recommend a modified paint scraper. The image below shows you what the modded scraper looks like. When you're spreading the CC towards the edge, you can let the scraper quickly slide straight off of the edge of the box and very little or no CC will come off of the scraper nor will it drip down the edge of the box (unless you have WAY too much CC on the workpiece). It probably works best if you wait until almost all of the CC has been spread on the center of the workpiece and just a little CC is left to be spread.
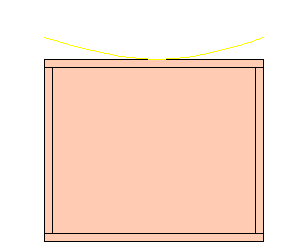
Laying the HPL down: Like I said before, the laminate will instantly bond when it touches the other glued surface. To help you get it laid down properly, you can flex the HPL slightly to allow a small amount of the HPL to touch the wood while you make sure that the two pieces are properly aligned. Then you can slowly lay the rest of the HPL down (from the center outward to the edges). The drawing below may help you understand what the heck I'm talking about.
Note: For very large pieces, you can use dowel rods or pieces of small nylon rope to keep the pieces apart until they're properly aligned. You lay several dowel rods on the speaker enclosure (or whatever you're covering) and then lay the HPL on top of the dowel rods. After carefully checking the alignment, you pull the dowels out one at a time as you push the two pieces together. Again, this should probably be done from the center out to make sure that the HPL lays down properly.
100% contact/adhesion: OK, since the HPL isn't infinitely flexible, there's almost no way to get 100% contact between the wood and the HPL but to make the best contact possible, use a rubber mallet to pound the HPL down to the wood. Pay particular attention to the edges but, since you need to do this before you trim the HPL flush with the box, you must be careful that you don't hit the laminate past the edges of the enclosure because it will break the HPL. If you don't have a rubber mallet, you can wrap a scrap piece of MDF in a cloth rag and hit it with whatever hammer that you have in your shop.
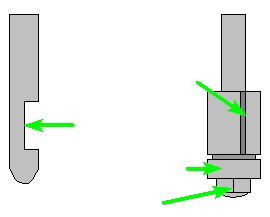
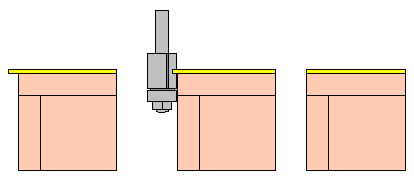
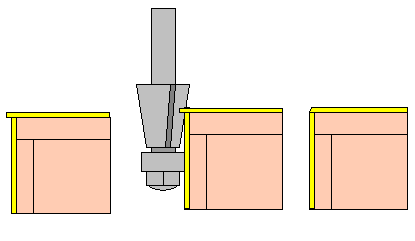
Like this: 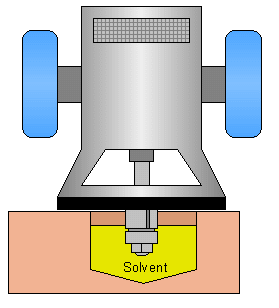
| If you
find a problem with this page or feel
that some part of it needs clarification,
E-mail me. This is a link to this site's home page. |